Sunday, March 31, 2013

Precast Concrete


Precast Concrete
Precast Concrete

Precast concrete has a lot to offer in concrete repairs. When compared to cast-in-place concrete, the advantages of using precast concrete are numerous:

 ■    Minimal cracking

■    Durability

■    Rapid construction

■    Lower maintenance costs

■    Improved appearance

■    Lower impact from onsite weather conditions

■    The ability to inspect the concrete before it is placed in use

 May eliminate the need for dewatering a lock chamber during repairs

Saturday, March 30, 2013

Preplaced Aggregate Concrete

Preplaced Aggregate Concrete
Preplaced aggregate concrete is more resistive to shrinkage and creep than conventional concrete is. This is due to the aggregate. The net result is more protection against cracking. This type of concrete can be used on numerous types of structures. The cost involved with using preplaced aggregate concrete is likely to be more, but it may be worth it in the long run.

When longitudinal reinforcement is required by design, the welding of stirrups, ties, inserts, and similar elements is not allowed.

Wednesday, March 27, 2013

Concrete cutoff walls


Concrete cutoff walls
Concrete Cutoff walls

Concrete cutoff walls are cast-in-place structures. They are used to provide a positive cutoff of the flow of water under or around a hydraulic structure, such as a dam. Geotechnical monitoring and review prior to making a decision to build a cutoff wall is prudent.

The average cutoff wall is between 2 to 4 feet thick. The procedure for preparing for and creating a cutoff wall can be tricky. A concrete-lined guide trench is made along the axis of the wall to be repaired. This type of trench is usually only a few feet deep. This gives a working service on both sides of the wall and helps to maintain the alignment of the wall.

Concrete is placed in the trench to create the cutoff wall. Discontinuities in the concrete can cause serious performance problems and must be screened for. The concrete mixture is very important. It will be used for tremie placement, and this requires strict adherence to required  specifications . You are not looking for compressive strength. The key elements are flow ability and cohesion.

Test panels should be created in noncritical locations near the wall location. These panels can then be tested to determine if the concrete mixture and the placement process is providing the desired result.

Tuesday, March 26, 2013

Concrete Placement

Concrete Placement
Concrete Placement


Concrete placement for the repair of lock walls is pumped or poured into forms. This may be done with flexible piping. The heights of walls vary. Some full-face pours may have a height of 50 feet. General procedure is to pour concrete on alternating monoliths. Concrete forms are normally removed anywhere from 1 to 3 days after concrete is placed. Membrane curing compounds are often applied to formed concrete surfaces.

Cracking is a persistent problem with repair concrete on lock walls. Cracking of thin layers of repair concrete can result from shrinkage, thermal gradients, or autogenously volume changes.

Monday, March 25, 2013

Design and Construction: Building in Value


Design and Construction: Building in Value 

The question is sometimes asked: “What is the difference between architecture and building?” One facetious answer is: ‘If the roof leaks, it’s architecture.’ The basis of this response lies in the architect’s quest for new and different ways of satisfying humanity’s basic need for shelter and security. Innovation always carries some risks and the risks attached to the pursuit of innovative approaches in the design and construction of buildings are exacerbated by the very nature both of the products (i.e., buildings) and of the industry that produces them.

The leaky roof symbolizes the problems that architects and builders face as they try to explore new designs and utilize new materials and construction methods – neither the designers nor the contractors are completely familiar with the new material or system and there are no previously completed installations to look at for guidance. The result is that new methods are only truly tested when they are used in ‘live’ projects and it may not be until a number of projects have been completed that any new method, material, component or system is completely satisfactory in use.

Sunday, March 24, 2013

The nature of buildings

The nature of buildings


There are many forces that help to determine why individual buildings come to be the way they are and they affect a variety of aspects of any one building: materials, shape,  color, size, form, style (or lack of it), choice of engineering systems, structural system, and more. Function or purpose explains much about the nature of many buildings and availability of resources (particularly money and materials) is often the primary determining factor.

 Many specific parts of a building’s nature are, however, determined by less obvious influences: a desire to build in an environmentally responsible manner, or a client’s wish to say something about image or status, perhaps by constructing a building larger or taller than that of a competitor. Much emphasis is now placed on building ‘intelligence’ and on streamlining construction to allow for faster completion. Integrated design, with multidisciplinary teams working closely together, is producing buildings quite unlike any before, with building fabric and services functioning together to minimize energy use and improve the health and productivity of the occupants.

Saturday, March 23, 2013

Concrete Construction

Concrete Construction


The term ‘Foamed Concrete’ may be somewhat misleading in that most do not contain large aggregates (indeed it may be considered to be foamed mortar or foamed grout). It is a lightweight concrete manufactured from cement, sand or fly ash, water and a preformed foam. Its dry density ranges from 300to 1600kg/m3 with 28 day strength normally ranging from 0.2 to 10N/mm2 or more.

A widely cited definition of foamed concrete is: “A cementitious material having a minimum of 20 percent by volume of mechanically entrained foam in the plastic mortar or grout”

This differentiates it from air entrained concrete which has a far lower volume of entrained air (typically3–8%), retarded mortar systems (typically 15–22%) and aerated concrete where the bubbles are chemically formed.

In the production of foamed concrete, a surfactant is diluted with water and passed through a foam generator which produces a stable foam. This foam is then blended into a cementitious mortar or grout in a quantity that produces the required density in the foamed concrete.

Surfactants are also used in the manufacture of Low Density Fills (also called Controlled Low Strength Material (CLSM)). In this case, however, they are added directly into a sand rich, low cement content concrete to give 15 to 25% air. Somewhat confusingly, some suppliers of Low Density Fills refer to these materials as foamed concrete, but as the foam is not formed separately to the concrete they are not true foamed concretes.

Monday, March 18, 2013

Composition of Concrete

Composition of Concrete


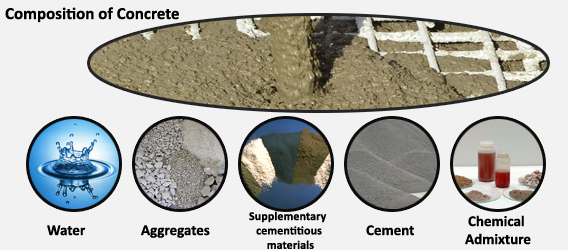
In general, foamed concretes with densities below600kg/m3 consist of cement, foam and water, with the possible addition of fly ash or limestone dust. Higher densities are achieved by adding sand. For heavier foam concrete the base mix is typically between 1:1 to3:1 filler to Portland Cement (CEM I). At higher den-sties (above 1500kg/m3) there is higher filler loading and a medium concreting sand may be used. As the density is reduced the amount of filler should also be reduced and at densities below about 600kg/m3 filler may be completely liminated. The filler size must also be reduced, first to a fine concreting or mortar sand, and then to limestone dust, pfa or ggbs at densities below about 1100kg/m3.

Cement and combinations

Portland Cement (CEM I) is normally used as he binder but other cements could be used including rapid hardening cement. A wide range of cement and combinations can also be used e.g. CEM I 30%, fly ash 60% and limestone 10%. Cement contents tend to be in the range of 300 to 400kg/m3.

Sand

Sand up to 5mm maximum particle size may be used but a higher strength is obtained using finer sands up to 2mm with 60–95% passing a 600 micron sieve.

Foam

The most commonly used foams are based on hydrolyzed proteins or synthetic surfactants. Synthetic based foaming agents have longer storage times and are easier to handle and cheaper. They also require less energy to produce foam, however protein based foaming agents have higher strength performance.

The preformed foam can be divided into two categories: wet foam and dry foam.

Wet foam has a large loose bubble structure and although stable, is not recommended for the production of foamed concretes with densities below1000kg/m3. It involves spraying a solution of the agent and water over a fine mesh, leading to a foam with bubbles sized between 2–5mm.

Dry foam is extremely stable, a characteristic that becomes increasingly important as the density of the foamed concrete reduces. It is produced by forcing a solution of foaming agent and water through restrictions whilst forcing compressed air into the mixing chamber. The resulting bubble size is smaller than wet foam at less than 1mm in diameter and of an even size.

Foaming admixtures are covered by BS 8443:2005 Specification for establishing the suitability of special concrete admixtures(BSI, 2005).

Other aggregates and materials

Coarse normal weight aggregates cannot be used in foamed concrete as they would sink in the light weight foam.

Mix details

The properties of foamed concrete are mostly dependent on the following aspects: volume of foam, cement content, filler and age.

Water/cement ratio has relatively little effect in strength but other factors like filler content and particle size do.

Wednesday, March 13, 2013

Curing and Demoulding: Initial Curing of Concrete Cubes


Curing and Demoulding: Initial Curing of Concrete Cubes
Immediately after curing, the cubes should be covered with damp matting or other suitable damp material and then with polythene or similar impervious sheeting and stored in a place where the temperature can be kept at 27± 5°C for approximately 16 to 24 hrs.

Demoulding the Test Cubes

Test cubes should be demoulded between 16 and 24 hours after they have been made. If after this period of time the concrete has not achieved sufficient strength to enable demoulding without damaging the cube then the demoulding should be delayed for a further 24 hours. When removing the concrete cube from the mould, take the mould apart completely. Take care not to damage the cube because, if any cracking is caused, the compressive strength may be reduced.

After demoulding, each cube should be marked with a legible identification on the top or bottom using a waterproof crayon or ink. The mould must be thoroughly cleaned after demoulding the cube. Ensure that grease or dirt does not collect between the faces of the flanges, otherwise the two halves will not fit together properly and there will be leakage through the joint and an irregularly shaped cube may result.

Curing Test Cubes

Cubes must be cured before they are tested. Unless required for test at 24 hours, the cube should be placed immediately after demoulding in the curing tank or mist room.

The curing temperature of the water in the curing tank should be maintained at 27-30°C. If curing is in a mist room, the relative humidity should be maintained at no less than 95%. Curing should be continued as long as possible up to the time of testing.

In order to provide adequate circulation of water, adequate space should be provided between the cubes, and between the cubes and the side of the curing tank. If curing is in a mist room, there should be sufficient space between cubes to ensure that all surfaces of the cubes are moist at all times.

Tuesday, March 12, 2013

Compaction: Filling the Cube Moulds and Compacting the Concrete

Compaction: Filling the Cube Moulds and Compacting the Concrete

After the sample has been remixed, immediately fill the cube moulds and compact the concrete, either by hand or by vibration. Any air trapped in the concrete will reduce the strength of the cube. Hence, the cubes must be fully compacted. However, care must also be taken not to over compact the concrete as this may cause segregation of the aggregates and cement paste in the mix. This may also reduce the final compressive strength.

 Compacting with Compacting Bar

 150 mm moulds should be filled in three approximately equal layers (50 mm deep). A compacting bar is provided for compacting the concrete. It is a 380 mm long steel bar, weighs 1.8 kg and has a 25 mm square end for ramming. During the compaction of each layer with the compacting bar, the strokes should be distributed in a uniform manner over the surface of the concrete and each layer should be compacted to its full depth. During the compaction of the first layer, the compacting bar should not forcibly strike the bottom of the mould. For subsequent layers, the compacting bar should pass into the layer immediately below. The minimum number of strokes per layer required to produce full compaction will depend upon the workability of the concrete, but at least 35 strokes will be necessary except in the case of very high workability concrete. After the top layer has been compacted, a trowel should be used to finish off the surface level with the top of the mould, and the outside of the mould should be wiped clean.

 Compacting with Vibrating Hammer or Table

During the compaction of each layer by means of a vibrating hammer, the mould should preferably be placed on a level piece of timber. The concrete should be vibrated by holding the foot of the hammer against a piece of timber placed over but not completely covering the top of the mould.

 The applied vibration by either the vibrating hammer or table should be of the minimum duration necessary to achieve full compaction of the concrete. Vibration should cease as soon as the surface of the concrete becomes relatively smooth and air bubbles cease to appear.

 Precautions to Take When Making Cubes

 While finishing off the surface of the concrete, if the mould is too full, the excess concrete should not be removed by scraping off the top surface as this takes off the cement paste that has come to the top and leaves the concrete short of cement. The correct way is to use a corner of the trowel and dig out a fair sample of the concrete as a whole, then finish the surface by trowelling.

 Once a specimen has been compacted, it should not be left standing on the same bench as another specimen that is being compacted. If this is done, some vibration will be passed on to the first specimen and it will be more compacted than the other. In extreme cases some re-arranging of the particles may result and segregation will occur.

Identification of Cubes

Immediately after making the cubes they should be marked clearly. This can be done by writing the details of the cube in ink on a small piece of paper and placing on top of the concrete until it is demoulded.

Monday, March 11, 2013

Sampling Fresh Concrete

Sampling Fresh Concrete

It is very important that the concrete put into the moulds should be a representative sample of the concrete that is going into the works. A sample of the concrete should be taken either as the concrete is being discharged from a mixer, or from a stationary lorry or heap; the latter method is less satisfactory.

The quantity of concrete required should be 10 kg for making each 150 mm cube, but in no case should the quantity of concrete sampled be less than 20 kg. Each sample should consist of at least six increments when it is taken from a heap or lorry, and at least four increments when taken from a chute or conveyor.

Sampling from Heaps or Lorries

The increments should wherever possible be distributed through the depth of the concrete as well as over the exposed surface. Care should be taken not to take any from the edge of a pile where large particles of aggregate may have gathered through segregation.

Sampling from Falling Streams, Chutes or Conveyors

When sampling from a falling stream, increments should be taken by passing a scoop through the whole width and thickness of the stream in a single operation. Alternatively, the entire stream may be diverted so that it discharges into the container.

Whichever way the samples are taken, the parts must be thoroughly mixed together so that the whole sample is uniform. If the sample is in a barrow, the remixing can be done in the barrow with a shovel or a sampling scoop; alternatively, and especially if the sample is in a bucket, it can be tipped over a non-absorbent base and then thoroughly mixed together.

Sunday, March 10, 2013

Cube Moulds


Cube Moulds
Cube Moulds

The standard size of cube is 150 mm.

Cubes of 100 mm size are not suitable for concrete having a nominal maximum aggregate size exceeding 20 mm.

Cubes of 150 mm size are not suitable for concrete having a nominal maximum aggregate size exceeding 40 mm.

 The moulds for the specimens must be made of cast iron or cast steel. The inside faces must be machined plane. The cube mould is normally made in two halves to facilitate removal of the concrete cube without damage. Each mould has a base, which is a separate metal plate, preferably fastened to the mould by clamps or springs. When assembled, all the internal angles of the mould must be right angles.

To comply with CS 1:1990, moulds are required to be within specified tolerances for dimensions, squareness and parallelism. These are covered in Section 7 of CS 1.

 Preparing the Moulds

Before assembling the moulds, make sure that there is no hardened mortar or dirt on the faces of the flange that prevent the sections from fitting together closely.

These faces must be thinly coated with mould oil to prevent leakage during filling, and a similar oil film should beprovided between the contact surfaces of the bottom of the mould and the base. The inside of the mould must also be oiled to prevent the concrete from sticking to it. The two sections must be bolted firmly together, and the moulds held down firmly on the base plates.

Saturday, March 9, 2013

Making Test Cubes from Fresh Concrete

Making Test Cubes from Fresh Concrete

1. Introduction

Concrete cubes are made on site to check that the strength of the concrete is above the minimum strength which has been specified.

Making, curing and testing cubes should be carried out in the correct manner. Even small deviations from the standard procedures will usually lead to compressive strength results which are lower than the true strength of the concrete. For example, for each 1% air entrapped there will be a 4 to 5% loss of strength. The procedures for concrete cube making are given in Testing Concrete.

Equipment

a.   Sample tray;

b.   Mould for making test cube;

c.    Spanners;

d.   Scoop;

e.   Steel float or trowel;

f.    Compacting bar;

g.   Vibrating hammer or vibrating table;

h.   Cleaning rags;

i.     A bucket or barrow for transporting the samples;

j.     Polythene sheeting;

k.    Curing tank.

Thursday, March 7, 2013

Density of Concrete

Density of Concrete
Density of Concrete

1.   Purpose:    The bulk density measure is used for determining the weight per cubic meter of freshly mixed concrete (density) from which the yield of concrete per cubic meter can be calculated.

2.   Procedure:      Methods of sampling and analysis of concrete

 i.      Take freshly mixed concrete from transit mixer by using wheel borrow.

ii.   Fill the cylindrical measure with concrete as soon as practicable after mixing.

iii.  Fill the cylindrical measure with concrete in layers approximately 5 cm deep and each layer shall be compacted.

iv.  While compacting the concrete the standard tamping bar shall be distributed in uniform manner over the cross section of the measure.

v.    The number of strokes per layer is 60 for 10 liters cylinder and 120 for 20 liters cylinder.

vi.  The exterior surface of the cylinder shall be tapped 10to 15 times or until no large bubbles of air appear onthe surface of the compacted layer.

vii.   Strike-off the top surface and finish it smoothly with a flat cover plate.

viii.  Clean all excess concrete from the exterior and weigh the filled measured.

ix.   Density of concrete (W1): The weight per cubic meter of concrete shall be calculated by dividing the weight of fully compacted concrete in the cylindrical measure by the capacity of measure in kg/cu.m (W1).

x.    Yield of concrete (V2) : The volume of concrete produced per cum. shall be calculated as follows.

xi.  V2= Wc+ Wf + Wca+ Ww

_____________________

              W1


 Wc= Weight of cement, kg

Wf = Weight of fine aggregate, kg

Wca= Weight of coarse aggregate, kg

Ww= Weight of water, kg

Wednesday, March 6, 2013

Concrete Vibrating Table

Concrete Vibrating Table


1.     Purpose

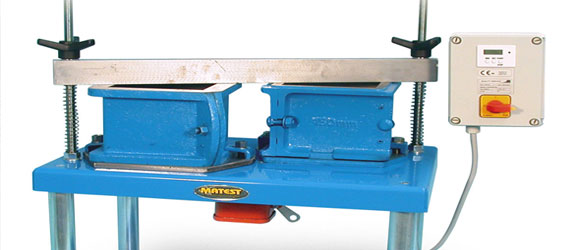
 Vibrating table is used for proper compaction of concrete while casting specimens for compressive strength determination.

 2.     Procedure

 i.     After preparing the concrete mix, put moulds on the vibration table platform.

ii.   Fill concrete in the mould in layers of 50 mm deep.

iii.  In placing each scoopful of concrete, move the scoop around the top edge of the mould as the concrete slides from it, in order to ensure a symmetrical distribution of the concrete within the mould.

iv.  Let each layer compact by vibration.

v.    After compacting concrete in 3 layers, finish the surface of the concrete level with the top of the mould.

vi.  Stop the table and remove the mould from it.

Tuesday, March 5, 2013

Concrete Slump Test


Concrete Slump Test
Concrete Slump Test
The slump cone is used for determining the workability of concrete where the nominal maximum size of aggregate does not exceed 38 mm.
B.   Methods of sampling and analysis of concrete

1.   Firstly decide the frequency of slump value to be taken during concreting.

2.   Oil the interior surface of the slump cone with mould releasing oil to prevent adhesion of the concrete.

3.   Place the slump cone on a leveled surface.

4.   Collect the sample in a wheelbarrow after mixing the concrete properly in the transit mixture.

5.   Remix the sample thoroughly in wheelbarrow with sampling scoop.

6.   After remixing immediately fill the slump cone in layers approximately one – quarter of the height of the cone.

7.   Each layer shall be compacted with the tamping rod by 25 strokes distributed in a uniform manner over the cross-section of the cone and for the second and subsequent layers tamping rod shall penetrate into the underlying layer.

8.   After compacting the top layer the concrete shall be struck off level with the top of the slump cone, using a _______. Any mould which may have leaked out between the mould and the base plate shall be cleaned away.

9.   Unscrew the slump cone from the base plate and remove it immediately from the concrete by raising it slowly and carefully in a vertical direction.

10. After the concrete subsides place the slump cone on the base plate in reverse position and place a scale on it. Measure the height between the top of the mould and the highest point of the concrete specimen being tested.

C.   Reporting of slump value:      The slump measured shall be reported in terms of millimeters.

Sunday, March 3, 2013

Central Mixed Concrete

Central Mixed Concrete

It is also called “central batching plant” where the concrete is thoroughly mixed before loading into the truck mixer. Sometimes the plant is also referred as “wet-batch” or “pre-mix plants”. While transporting the concrete, the truck mixer acts as agitator only. Sometimes when workability requirement is low or the lead is less, non-agitating units or dump trucks can also be used.

Saturday, March 2, 2013

Shrink Mixed Concrete

Shrink Mixed Concrete

The concrete is partially mixed in the plant mixer and then balance mixing is done in the truck mounted drum mixer during transit time. The amount of mixing in transit mixer depends upon the extent of mixing done in the central mixing plant. Tests should be conducted to establish the requirement of mixing in the drum mixer.